Started a new project without finishing another WIP projects :) guess it is quite common.
Picked up the F355, my favourite model of sport car. However, after reviewing the kit from Fujimi, sure it is NOT the favourite scale model :)
Change another point of view, challenging project will also mean opportunities to improve skillset and most importantly - training my patience.
Started with marking of mould lines and sand them down, also do away the Ferrari word on the rear engine cover, will replace it with PE part :

Assembled the side air intake and applied polyester putty, gaps are everywhere. Also filled the area where the logo suppose to be on the bonnet, will replace by PE part.

Learning from some other bloggers' project online, the rear window fitting is not great. Some complaint that there is a large gap between the transparent part and the body. Suggestion to all who start this kit, test fit the window parts and fill the gaps if any, before it becomes too late :)
Decided to open up all the slits - 2 in front bonnet, 22 on the rear engine cover, and 1 more at the rear bumper area.

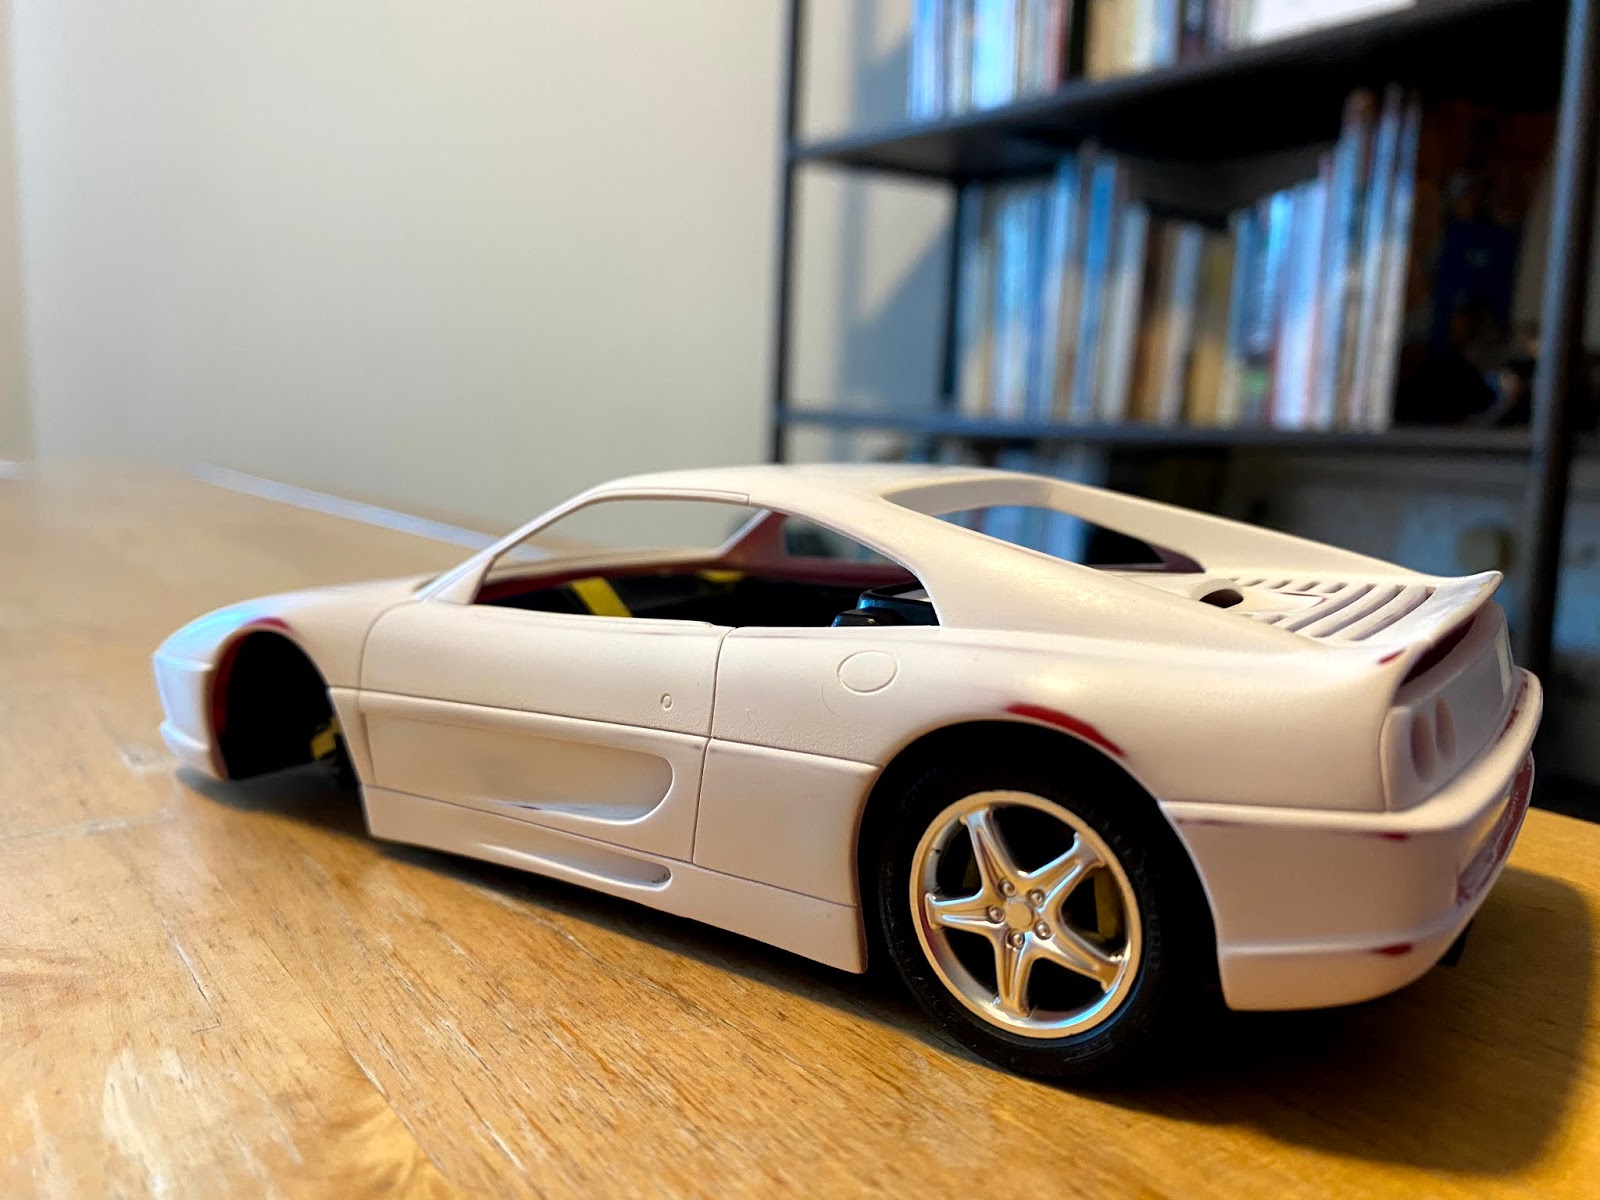
Applied first layer of surface primer to check defects. Also test fitted the body shell and the chassis, required some modification to fit in.

The two seats have lots of empty area so filled in Tamiya epoxy putty.
4 thin layers of Tamiya white surface primer - diluted with 1:2 Mr Color Thinner, 20 PSI and spray with Iwata HP-TH 0.5mm airbrush. I found that this primer might need more diluted (next time try 1:3) and thin layers to achieve a smooth surface. I don't have the same issue when using Mr Color surface primer.
If you ever build this kit, be prepared there are quite some work to prepare the body shell.


